Friday, May 16, 2014

Kitchen update with Ardex counters....

Alrighty I'm in the middle of painting but I just wanted to give you a quick update on the progress I'm making...
See the flowers I got for Mother's Day? Thanks Babe!

If you remember in my last post my counters didn't turn out the way I had hoped with the glaze coat so I sanded them down with coarse sandpaper...see above.
And then applied the Ardex again...two coats...sanded with fine sandpaper then resealed with an oil based polyurethane. 
They turned out perfect! I LOVE my new counters. Water just beads up on them with no problems.
I will share more pics of them when I reveal the whole kitchen soon. :)


Another progress note is that I installed the wood beam with antique cornices and ran the wires for my mason jar chandelier. It was tough work but I managed to do it all by myself, (well also with the help of some great tutorials on the web which I will link to soon) though I have to give credit to my hubby for helping me tear out the old cabinet that was there and for not giving me too much grief about having less cabinets in the kitchen.
Also perhaps you notice the ends of the cabinets have beadboard now, though this one still needs a little piece of side trim.

Anyway that's all for now. I'll be back soon. :)


Monday, May 12, 2014

Ardex countertop new direction...

I absolutely adore the texture from the troweling process, then I went to seal and decided on a gloss coat for bar tops for maximum durability. 
Love this product...4 foot plastic with tape already on it, so easy to use!
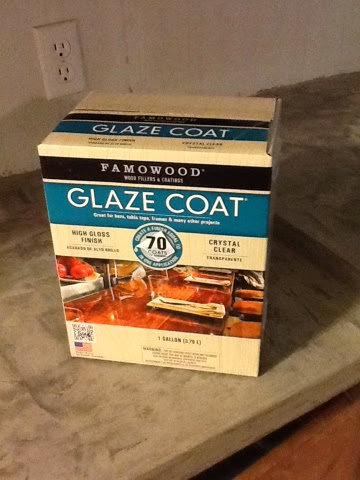
So this is what I chose to use for the sealer for my countertops. FAmowood Glaze Coat from Lowes. I figured I wanted a really good seal and this would do the trick. It did seal quite well, but...made my countertops so dark I don't like them.:( sad face. . .
Plus the glaze coat was a bit difficult to work with, it sets up super fast and the areas I had to cover were too big to do myself. Not very happy with how this particular DIY turned out. 

BUT!.....the good thing about Ardex is that it is extremely easy to work with so I'm just gonna sand that glaze coat, apply a few more thin layers of Ardex and seal it with Polyurethane to get the color and finish I want. :) I'll update in a few days and let you know how it's going. :)


Friday, May 9, 2014

Ardex countertop part 2

Continuing my post from the other day...
I have put three coats of the Ardex product on my counter using a wide concrete trowel on the first two then a much smaller 3" wide putty knife on the 3rd layer. The reason for this is that I want a really textural look to my finished countertop, possibly, hopefully a little more like stone in the end rather than flat perfect concrete. Then after the third layer was on I used the excess and now thicker Ardex that was still in my bowl and went back and smeared it on roughly here and there because it seams that the best textured results come when you sand the last layer with fine grit sand paper. The fine sandpaper has an almost polishing effect on the Ardex and it's those areas that end up darker. Or so I've read. It's all just a big experiment, I hope it turns out well. I'm sure I will love them when they are done, as I already love them now and they aren't even done yet. The hubby just wishes "yet another" project was done. He's tired of not being able to use the kitchen. Diddo!
I'm sorry the pictures aren't the greatest. I hope to update with better quality ones from my camera but for now IPad pics in early morning light are all I've got. :) hopefully you can see the smearing spots here and there to achieve maximum texture when the counter is finished.
In the process of sanding down the last layer (no I didn't waste time sanding between each and every layer) mainly because I'm going for that textured look and because I'm lazy lol. I'm using my black and decker sander first to do an overall smoothing then I'll go back with the fine grit sandpaper to get the polished effect I'm looking for in a final sanding.


Wednesday, May 7, 2014

Ardex countertop...my kitchen remodel on a budget...


I've been so busy the last couple of weeks, so much is going on in our family life right now. And in the middle of it I'm trying to tackle a budget (very tight budget) kitchen remodel and doing all the work myself because hubby is working 60 hours a week in the next state over. So here we are at the before photo. I have removed the rotten warped back splash and replaced it with wood boards screwed to the wall. I also removed the two strips of vinyl from the front edges of the counter since they were peeling off anyway. 
This is where I used to have three broken drawers that had been repaired over and over only to rebreak shortly after because of the practical board poor quality of the surrounding wood. Well I ripped those out in favor of a tilt out trash bin, which I adore (and wich will look better when I get finished painting everything) It is so handy right next to the sink and stove and the trash can is no longer out on the kitchen floor where it was almost always overflowing cause no one would empty the darn thing. Now it always gets emptied because it won't close when it's too full, lol.
You can see a tiny shot of what my drawers looked like before in the circled area above. I didn't go by any specific plan for building the tilt out bin, I just looked at how they were made and made my own to fit the space with hinges at the bottom.

But enough of that, back to the ardex countertop...


Next I removed the old drains from the sink and replaced them since they were old and leaking under the sink, not good.

This is the area to the right of the stove. See that long counter to the far right, it is also our bar and we have room on the other side to place our bar stools. There used to be another set of cabinets above that bar. We ripped those out because they blocked everything, they had ugly mirrored doors wich allowed anyone in the living room to see all the foods in those cabinets and just generally were ugly and in the way, say bye bye, and I haven't regretted that one for a second.

Ok, ok, I'll get back to the Ardex...
So I've seen so many tutorials online and they are all so helpful and exciting to see. I was so inspired I went looking for Ardex and as luck would have it there was actually an Ardex dealer in my town! Score! I bought it for $22 a bag and bought two bags cause I have a lot of counter to cover. A mixing bowl, some glove, Ardex, and water are pretty much all you need to get started...
Mixed to pancake batter like consistency. Really glad I made it like this cause it did set up pretty good by the time I finished the counters to the left of the stove around the sink.
One coat down and I can't wait to see how this turns out...
I chose to do the trowel in different directions and didn't concentrate too much on making perfectly flat layer. I'm going to the more artistic textural style even though it will be fairly smooth when I'm done. 
The edges are a bit tricky we shall see how this goes.
This is the counter bar to the right of the stove. I also have a smaller counter on the other side of the room that I'm doing as well.

I did all this yesterday and this morning they are dry and ready to sand, though I'm not going crazy on the sanding, just enough to knock down the highest ridges
Today is the second coat...I'll update when I'm done.